 La RochereclearSearch
 La RocherecolourSearch
 La RocheretransparencysandblastingSearch
 SolarisclearSearch
 SolariscolourSearch
 Rods and Mortargolden rulesmortarexpansionreinforcementspacers & jointspanel anchorsinstallationspecisicationopening sizescurves
 EasifixGolden Rulesframespaceranchor bracketadhesiveInstallationopening sizes
  Precast Concretefire ratedgolden rulesu channelinstallation
 Precastaboutinstallation
 Safewallend postscorner posts
 4 sided supportabout
 3 sided support open topend posts
 3 sided support open side
 2 sided support
 corner glass blockscornerpost


installation
GUIDE TO INSTALLING RODS & MORTAR SYSTEM
TOOLS REQUIRED
Trowel, spirit level, rubber mallet, wooden spatula, hacksaw, pointing tool, silicone and caulking gun, drill, mixing bucket and squeegee.
ACCESSORIES REQUIRED
Blocks, bitumen and foam expansion joints, Colmef mortar, stainless steel rods, plastic spacer pegs (panel anchors – if required).
PREPARATION OF OPENING
Calculate the correct opening size. Make sure the opening is square and perpendicular. Lay bitumen expansion material along base of opening. Secure expansion foam to jambs and head. All four sides of the opening should now be covered in expansion material (See fig.1). Bitumen is necessary on the base to take the weight of the glass block wall.

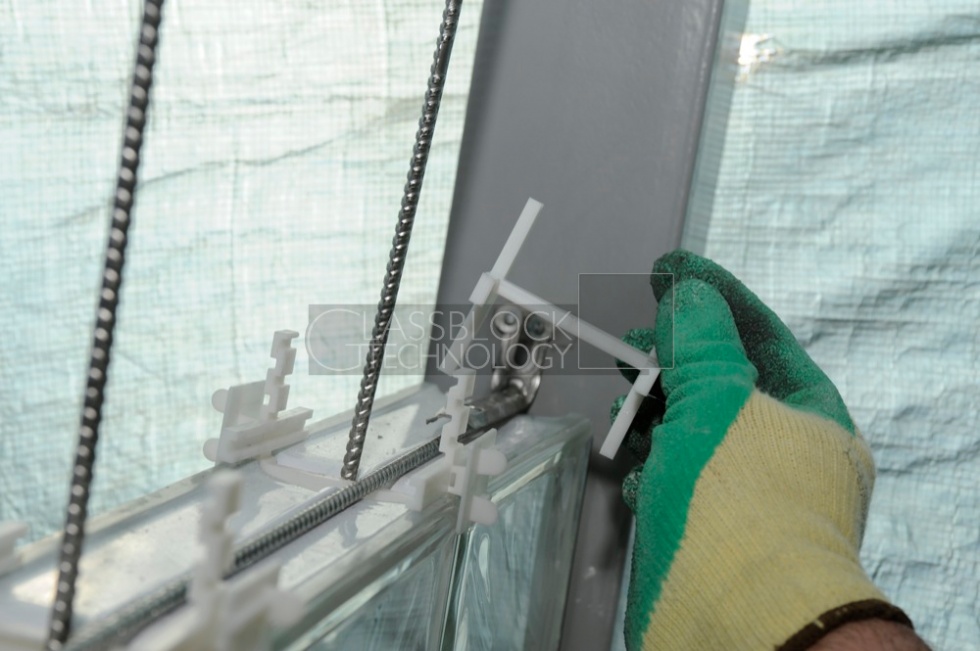
Set out dry the first row of glass blocks to ensure opening size is correct. Mark accurately and drill oversized holes in between the blocks, vertically and horizontally where rods will be positioned. Fill holes with silicone and fit vertical bars in place (fig.2).

LAYING FIRST COURSE
Mix Colmef Vetromix glass block mortar following instructions on reverse of bag (fig.3). The mix should be a semi-dry consistency (slump 1 or less). Lay down a bed of mortar.
Fit first block and tamp down gently, fit second block and repeat. Ensure there is enough mortar between the blocks and the base to create sufficient adhesion, compact the vertical mortar joint using a wooden instrument. (fig.4). Note: Spacer pegs are required between base and first row of blocks.


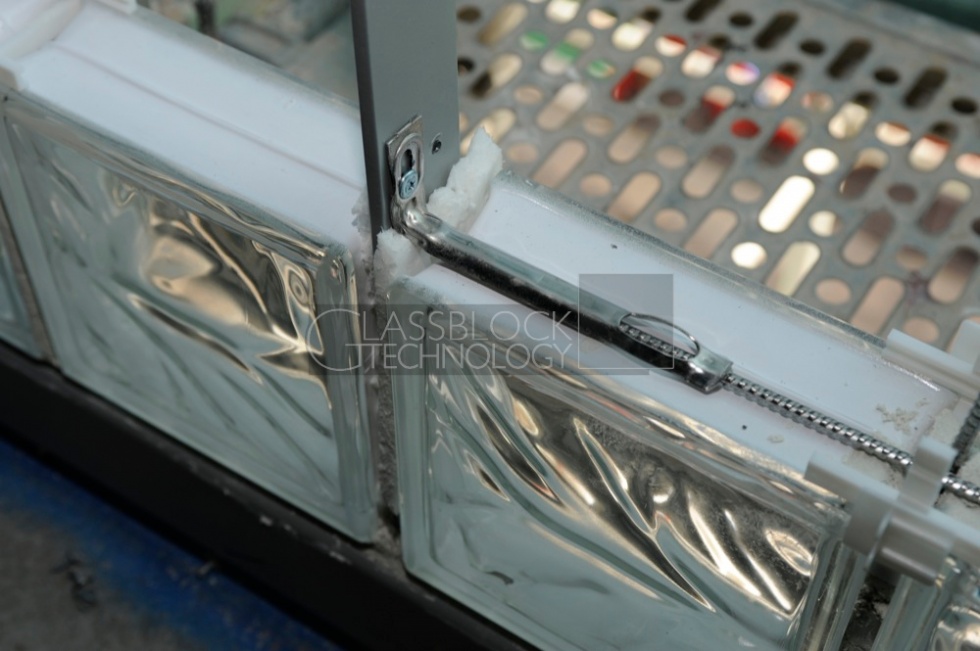
BUILDING THE PANEL
Repeat step 4 until you have completed the first row. Insert spacer pegs in between blocks. This prevents steel rods from touching glass (fig.5). Lay half the quantity of mortar and fix the horizontal rod in position, not forgetting to put silicone in the holes, then cover over the rod with remainder of mortar (fig.6). Rods have to be positioned every row vertically and horizontally. If using a U channel, two stainless steel reinforcement rods are required within the perimeter.
Fit next row, remembering to check vertical and horizontal alignment.
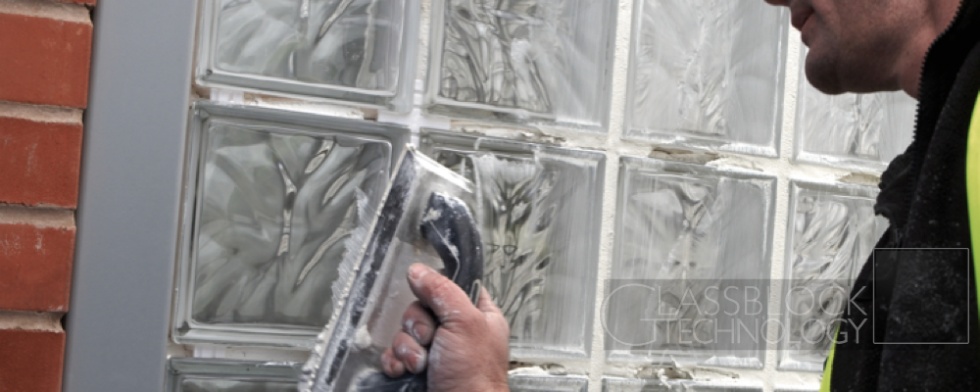
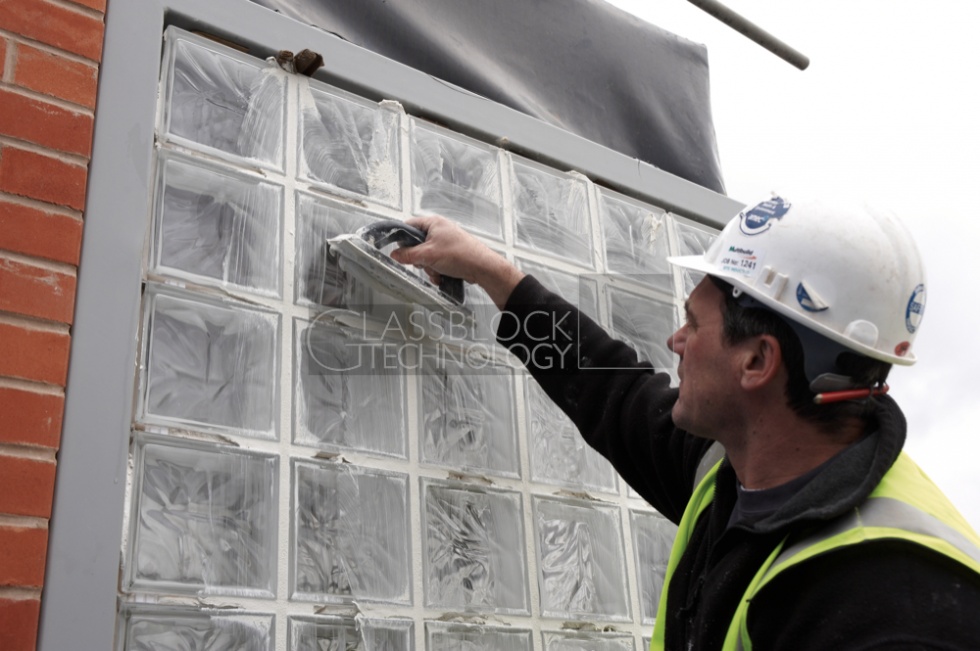
FINISHING THE GLASS BLOCK PANEL
When the wall has set, snap off spacer tabs and grout all joints with diluted Colmef mortar.

SEALING AND WEATHERPROOFING THE
GLASS BLOCK PANEL
Mastic around perimeter of expansion foam to create a weatherproof seal.
INITIAL CLEAN AND AFTER CARE MAINTENANCE
Do not clean with any acidic products. The best product for cleaning is water. Polish each block with a soft cloth using good old elbow grease.
Note: Clean face of block as work proceeds.
The glass block installer should have left the glass block wall in a clean, unblemished condition, requiring only periodical cleaning to maintain an excellent appearance.
However, there may be a residue of cement on the glass surface left from mortar/tiling grout identified by whitish bloom when dry. This may be removed by use of proprietary cement stain remover.
HYDROFLUORIC ACID OR DERIVATIVES MUST NOT
BE USED.
Paint or cement may be removed by a blade, taking care not to scratch the surface of the glass.
Periodic cleaning is required using clean water. Buff up with a chamois leather or in clean water use a proprietary glass cleaner and clean off with a lint-free cloth.
 GBT100 Rods & Mortar